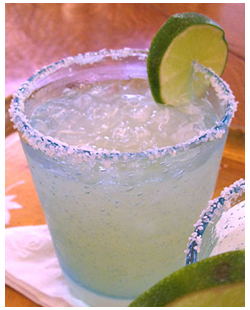
Showing posts with label mexican. Show all posts

Citrus Salsa With Heirloom Tomatoes and Avocado


A Refreshing Summer Twist To A Mexican Classic


Salsa is one of my favorite things to re-invent.  There is just so many directions you can take it!  This is a bright and tart salsa "cruda" using heirloom tomatoes.  The secret is to remove all of the tomato water and seeds so as not to make the salsa watery.


Salsa Verde Cruda Recipe


In this salsa verde recipe all of the ingredients are raw, making it a "cruda".  This salsa is spicy and tangy and perfect with chips or spooned over a grilled chicken breast.

  • 8 ounces (5 to 6 medium) tomatillos, husked and rinsed
  • Fresh hot green chiles, to taste (roughly 2 serranos or 1 jalapeno), stemmed
  • 5 or 6 sprigs fresh cilantro (thick stems removed), roughly chopped
  • Scant 1/4 cup finely chopped onion
  • Salt
Roughly chop the tomatillos and the chiles. In a blender or food processor, combine the tomatillos, chiles, cilantro and 1/4 cup water. Process to a coarse puree, then scrape into a serving dish. Rinse the onion under cold water, then shake to remove excess moisture. Stir into the salsa and season with salt, usually a generous 1/4 teaspoon.
Taken from Rick Bayless - Green Tomatillo Salsa

Mexican Cinnamon Hot Toddy Recipe


Bourbon Hot Toddy

Ok, so this Hot Toddy recipe isn't necessarily Mexican. I only call it a Mexican Hot Toddy because as a kid, my mom used to make this Cinnamon tea using whole Mexican cinnamon sticks whenever I was sick. I make the tea, just like my mom did only I add a splash of Whiskey Bourbon!

Mexican cinnamon can be found in the ethnic section of the grocery store. I never buy cinnamon sticks from the regular grocery store. Those small jars with 2 small sticks cost over $5! Mexican cinnamon comes in a small bag with like 10 sticks and only costs $1.50!


Ingredients

3 cups of water
2 large cinnamon sticks, broken up
1 tablespoon of honey
1 tablespoon (or more!) of good Whiskey Bourbon

Directions

Add water and cinnamon to a small sauce pan. Bring water to a boil and let reduce by a quarter, around 4 minutes. Strain tea with a sieve and pour into a mug. Add honey and bourbon and enjoy!

Easy Recipe For Tuna Tacos In Jalapeno Escabeche


2 Cans, 1 Easy Dinner

A Mexican escabeche is very similar to pickling, so this recipe is tuna tacos in pickled jalapenos. An escabeche can be any acidic marinade, usually vinegar or lime juice. With this easy recipe all you do is buy a can of whole pickled jalapenos (you can find them in the ethnic section of the grocery store)and add canned tuna to the mix....well there's a little bit more to it than that, but not much.

The results are bold, complex, and explosive. I was shocked at how much flavor was packed into these little tacos. I saw this recipe on Rick Bayless' show and on a whim decided to make them. They are now my new favorite taco!

Recipe in second part of post...

Ingredients

1 12-ounce can pickled jalapenos
2 tablespoons good-quality olive oil
1 large white onion, cut into 1/4-inch slices
2 6-ounce cans tuna (tuna packed in oil works best here)
1/4 cup roughly chopped flatleaf parsley (or a mixture of fresh herbs)

Directions

Remove the jalapenos and vegetables (typically carrots and onions) that have been packed with them; reserve the liquid. Cut the stems off 2 to 3 of the jalapenos, cut them in half and scrape the seeds out; discard stems and seeds. Thinly slice the chiles (you need about 1/4 cup). Thinly slice some of the vegetables (you need about 1/4 cup of these also).

In a large skillet, heat the olive oil over medium. When hot, add the onion and cook until richly golden, about 10 minutes. Remove from the heat and stir in 1/4 cup of the jalapeno pickling juice. Let cool. Stir the onions into the tuna, along with the sliced jalapenos and vegetables and the parsley or herbs. Set out for your guests to roll into warm tortillas to make soft tacos.

Salsa de Chile de Arbol Recipe


Robust Twist On Classic Salsa

I currently have a bee in my bonnet called SALSA! I'm consumed by it. I'm not really sure how it started, but I've been making a different type of salsa every week for the last two months! This one is by far my favorite.

Chile de Arbol is a small dried red chile found in Mexican super markets. These punchy little suckers pack tons of flavor in their tiny little pods. Pungent and spicy, chile de arbol is a staple in the Mexican kitchen and a key player in this smoky and garlicky salsa.


Ingredients

1/2 ounce (about 16) chile de arbol
6 large garlic cloves, unpeeled
1 pound (10 to 12 medium) tomatillos, husked and rinsed
1/2 teaspoon Salt, or more to taste
Sugar, about 1/2 teaspoon

Directions

In a dry cast iron skillet roast the chile de arbol for 4 minutes making sure not to burn them. This step is just to release the oils in the chile. Remove the chiles and add the tomatillos. I slice the tomatillos in half and add them to the pan. Reduce heat to medium and add the garlic. Roast tomatillos and garlic until both are soft and charred. They should like this:


Place all ingredients in a blender or food processor and blend until completely smooth.


The garlic in this recipe really adds a complex sweetness to the salsa because the roasting transforms the garlic. Use this salsa as a dip with chips or add it to tacos, chicken, anything really! This recipe comes from the almighty Rick Bayless.


Salsa Ranchera de Chile Guajilla


Restaurant Style Salsa With A Twist

The thing I like about salsa is that there are countless ways of making it.  My mom has about five stand-by recipes and I've been trying, to no avail, to recreate them.  She usually walks me step by step, exact ingredient amounts and all, and still it never tastes as good as hers.

Lately I've turned to researching authentic salsa's and have consistently turned to Diana Kennedy's "The Essential Cuisines of Mexico" for inspiration which is where this salsa recipe is modified from.  This salsa is very close to a restaurant type salsa but with the addition of Guajilla Chiles which add a complex smokyness. Dried Guajilla's are a variety of chile and can usually be found in the ethnic section of the grocery store or at your local Mexican/Latin market.

Recipe after the jump...

Ingredients

3 Guajilla chiles wiped clean, veins and seeds removed
1 large tomato
1/4 of a white onion, coarsely chopped
1 large garlic clove
2 tbs chopped cilantro
1/2 a jalapeno pepper
salt to taste

Directions

Heat a griddle and toast the chiles lightly on both sides careful not to burn them or the salsa will taste bitter, 1 minute or less (you just want to release a bit of the oils). Next, place the tomato and toasted Guajilla in a small sauce pan covered with water and boil until soft, about 5 minutes. Let cool.

Add remaining ingredients in blender and blend until smooth. If salsa is too thick add some of the cooking liquid to thin out. Enjoy


Pickled Jalapenos with Onions and Garlic

pickled jalapenos

Traditional Pickled Jalapenos

This is a simple yet classic condiment in Mexican cuisine. I like to make these and use them on top of tostadas, inside quesadillas, and are especially good inside tacos.

You'd think that these are hot and spicy, but in actuality these are sweet and tangy. The jalapeno is raw, so it has a bit of a bite and because of the vinegar a sour fling. Yum!

Pickeld Jalapenos in second part of post...

Fresh Jalapeno Chile Relish

Adapted from The Essential Cuisines of Mexico - Diana Kennedy

10 Jalapeno Chiles
1 Medium white onion, thinly sliced
4 garlic cloves, left whole
1 1/2 teaspoon salt
1/2 teaspoon oregano
3/4 cup champagne vinegar
1/4 cup vegetable oil

Directions

Remove the stems and cut in half lengthwise. Remove as many of the seeds as possible and cut each chile into four strips. Mix with the rest of the ingredients and set aside to marinate for at least 2 hours.


Reblog this post [with Zemanta]

Anatomy Of A Killer Tostada!


The weather is starting to sizzle here in Los Angeles. Many warm, lazy Sunday afternoons are ahead of us. On such days the last thing I want to do is slave in our hot, tiny kitchen fixing dinner.

I mean sure, Mike will make me a Margarita to make the heat a bit more bearable, but who in their right mind wants to stand over a stove when they could be relaxing under the patio umbrella reading the NY Times!

What does this have to do with Tostadas, you ask? Plenty. You see, when I think of Tostadas I think of my mom. My mom hated cooking during a heat spell for the very same reasons I do....it sucks. So instead of cooking an elaborate meal, she would make tostadas.

Tostadas are perfect Summer food because there is little cooking involved and tostadas can be topped with just about anything. There is an art form to constructing a killer tostada though....you can't just pile stuff on. So I've devised this guide detailing the anatomy of a killer tostada.

Anatomy of a killer tostada in second part of post...

Layers and Textures

The key to a killer tostada is to layer the flavors and textures so that they contrast and compliment each other. Almost any type of ingredient can be used but there are a few guidelines to follow. Below is a little sketch I made of the anatomy of great tostada.


First Layer - Tortilla

The very first layer is the fried tortilla. Many mainstream grocery stores sell pre-made tostadas but I HIGHLY recommend that you DO NOT purchase these. Most of the pre-made tostadas are not in fact fried tortillas, but rather ground up corn that is then placed in a mold to look like a tortilla.

Besides, all you really need to do is fry a cold tortilla on both sides in some vegetable oil until both sides turn a dark brown. It's important that you allow the tortilla to fully brown because if you don't it will be chewy and not flaky and crunchy.

Home fried tortillas are FAR superior in taste and texture so don't skimp on this step. Remember, this is the foundation of the tostada!

Second Layer - The Mushy Stuff

I think of the second layer on a tostada sort of as the glue. The second layer should be an ingredient that is mushy, easy to spread, but thick enough so the rest of the ingredients can sink in and not fall off.

The classic ingredient for this is refried beans. Take your tostada and spread some refried beans on to it making sure to coat the entire center. I like to leave a little room near the edges so that when you pick up the tostada with your hands you don't get beans all over them.

Other ideas are guacamole, melted cheese, hummus, or any type of spread really.

Third Layer - The Meat

The third layer should be the main ingredient in the tostada. All other layers and ingredients should compliment and be designed around THIS ONE. Most often the third layer is a protein like chicken, beef, pork, etc. But it doesn't literally have to be meat. However, if it isn't meat, make sure you choose an ingredient that is a bit firm and has bite because you want this layer to contrast in texture with the mushy layer.

I often make tuna tostadas using guacamole as my mushy layer...Yum!

Fourth Layer - Refreshing Crunch

The fourth layer is intended to add complexity to the flavors and textures already present. Adding chopped lettuce, cabbage, raw onion rings, etc. can really add a wonderful crunch.

For the tuna and guacamole tostadas, I added marinated red onions to compliment the tuna flavor and they were divine!

Fifth Layer - The Sauce

The last layer is intended to add moisture to prevent the tostada from being too dry. Salsa of course, is the obvious ingredient here but don't be afraid to think outside the box. I often drizzle tostadas with thinned sour cream, or squeeze a bit of lime juice over the whole thing.

As you can see, a killer tostada can be endlessly modified and of course, this anatomy is more of a guideline than it is a rule. Feel free to change and disregard any of these guidelines.

Do you have a favorite recipe for tostadas? Leave me a comment and let me know.

20 Delicious Mexican Dishes

Stacked Chicken Enchiladas

Sunset Magazine is my new favorite magazine.  Very cool recipes, gardening tips, etc.  Check out these delicious looking Mexican recipes....right in time for Cinco de Mayo!


Best Mexican dinner recipes - Photos - Sunset.com

The Perfect Margarita

Great article on what makes the perfect Margarita. I'm not sure about the 1:1:1 ratio, but I like the explanations of all of the ingredients.


Chris Hall: The Perfect Margarita - Huffington Post

Tomatillo Salsa

This salsa looks delicious.  I can imagine it with chips or on some tasty carne asada.

 Cinco de Mayo is right around the corner.  Looking for Mexican inspired dishes for your Fiesta?  Check out my Palm Springs Mexican inspired BBQ for inspiration!

20090423-grilled-tomatillo-salsa.jpg

Grilling: Tomatillo Salsa | Serious Eats : Recipes

Roasted Tomato Salsa Recipe

banana cakeBy Danny


Easy To Make Salsa


I love me some salsa. This recipe is a variation of my original RESTAURANT STYLE SALSA. The only difference really is that the tomatoes, onions, and jalapeno are roasted under the broiler for a few minutes, and poof! New variation on a classic recipe!


Roasted Tomato Salsa Recipe in the second part of post...

Ingredients


  • 2 tomatoes, quartered
  • 3 cloves of garlic
  • 1/2 white onion, coarsely chopped
  • 1 fresh jalapeno pepper
  • 1/2 cup chopped cilantro
  • 1 teaspoon salt


Directions


Place tomatoes, and jalapeno in the center of sheet pan. Sprinkle chopped onions on top of tomatoes. Pour a bit of olive oil over the tomatoes, no more than 1 tablespoon. Place sheet pan under broiler for 5-10 minutes, or until tomatoes are soft and are just beginning to brown. Place tomato/onion mixture in a food processor and add remaining ingredients. Blend until all ingredients are thoroughly incorporated. Enjoy!

Authentic Restaurant Style Salsa Recipe

By Danny

salsa recipe

Chips and Salsa

Mmmm. Salsa. I love salsa! My mom always has a batch of salsa ready for dinner, and I recently got around to asking for her recipe! I made a few changes, of course. My mom roasts her own chili's and tomatoes which just seems like too much work for me. You can whip up this delicious salsa in less than five minutes!

Restaurant Style Salsa Recipe after the jump...


Restaurant Style Salsa

1 can of roasted, diced tomatoes
1 fresh tomato, diced
3 cloves of garlic
1/2 white onion
1 fresh jalapeno pepper
1/2 cup chopped cilantro
1 teaspoon salt

Place all ingredients in a food processor and process until a smooth salsa emerges.

Salsa Tips!

-Add more or less of each ingredient to change the entire profile of the salsa!

-Wrap the jalapeno and tomato in aluminum foil and place directly on the stove top. Roast for 5-7 minutes. Wait until cool, and peel both the tomato and the jalapeno and add to the food processor. Roasting these ingredients adds an incredible smoky flavor!

Versatile Mexican Tomato Sauce (salsa)

By Danny

tomato sauce

Salsa Used in A Variety of Mexican Dishes

My mom uses this all purpose sauce to make a variety of traditional Mexican dishes. It's a staple in the Mexican kitchen and it can be endlessly modified. It's basically three ingredients, but the modifications come with the amounts, how you prepare them, and the cooking process. I used the sauce to make Chilaquiles, a popular Mexican breakfast.

Mexican Tomato Sauce after the jump...

The Sauce


2 tomatoes
1/2 onion
1 garlic clove
1/2 Jalapeno
1/2 teaspoon salt

Place all ingredients in a blender and blend until sauce is smooth. The sauce is ready to use at this point. It needs to be simmered for a few minutes, so I usually add it to whatever ingredients I'm cooking. For the Chilaquiles, I add it at the very end and let it simmer for a few minutes. You can sautee chicken and add it toward the end of cooking. Pork, beef, anything really!


Chilaquiles


3 Tortillas sliced into wedges
1/2 onion
4 eggs
1/2 cup of Tomato Salsa from above recipe
2 tablespoons of olive oil

Heat olive oil in pan over medium heat. Add the tortilla and fry until crisp, about 5 minutes. Add onions and saute until soft. Add the egg and stir until cooked. 1 minute before eggs are finished cooking, add the sauce. Continue cooking for an additional 2 minutes. Add salt and pepper to taste. Enjoy!

UPDATE: Welcome to all the new readers who found us from Stumble Upon! Take a look around and if you like our recipes, please subscribe to our RSS feed! Click the big orange button on the upper right hand side to subscribe!

Braised Pork Shoulder with Salsa Verde

By Danny

pork salsa verde

Pork Shoulder Recipe

My braising obsession continues to grow. I simply love the fact that you can get extremely delicious dishes with such a simple technique. I've made this Salsa Verde Pork Shoulder twice now and I still think it is one of the best braising recipes I've ever tried. I made this yesterday for a potluck lunch at Michael's work, and by the look of the empty tupperwear container, I think Michael's co-workers liked it!

Recipe after the jump...

This recipe is adapted from a recipe in Sunset Magazine, February 2008

Braised Pork Shoulder with Salsa Verde

3 1/2 lbs. bone-in-pork shoulder (aka pork butt)
1 bottle of salsa verde (yes, bottled salsa verde. you can make your own I suppose)
1 medium onion, coarsely chopped
3 cups chicken broth
2 tsp each ground cumin seeds and coriander seeds
1 tsp dried oregano
1/2 cup chopped fresh cilantro
Salt to taste

Trim excess fat from pork shoulder. Heat 1 tsp of olive oil in heavy cast iron dutch oven. Place pork in hot oil and sear each side until all sides have a nice, crisp, brown sear. Add onions and sweat for a minute. Add salsa, cumin seeds, coriander seeds, oregano and broth. Bring to a boil, reduce heat, and cover. Simmer until meat is very tender and falls off the bone, about 4 hours.

After meat is done braising, take pork out of dutch oven and place in baking pan. Heat over to 375 degrees and bake pork for 30 minutes until richly brown. Once brown, place in broiler for an additional 3 minutes to make outside charred and crispy! While pork is baking, skim salsa verde sauce of all excess fat and oil. Once pork is done crisping in broiler, tear pork apart with two forks and place back in salsa verde sauce. Add salt to taste and add cilantro and serve immediately. Enjoy!

Poached Chicken Tostadas with Marinated Onions


This is a simple lunch recipe perfect for a hot summer day because it doesn't involve much cooking. My mom always makes these during a hot Sunday afternoon!

1 Chicken breast
1 can of pinto beans
1 avocado
salsa
bunch of cilantro
Marinated onions
Cotija Mexian cheese
tortillas
chicken stock

Poach chicken in chicken stock until cooked. Cool chicken and shred. Heat beans. Fry tortillas in vegetable oil until brown. Take tostada, fill with beans, salsa, and chicken. Top with avocado, cheese, cilantro, and marinated onions. Enjoy!

Black Bean Salad with Red Onion and Jicama

black bean salad

Delicious Cold Salad

This is a delicious and refreshing salad that is full of robust flavors and variety of textures! It's perfect with CARNE ASADA or a CHEESEBURGER!

Ingredients

2 15-ounce cans black beans, rinsed, drained
1 cup 1/3-inch diced peeled jicama
1 cup 1/3-inch diced tomato
1/3 cup thinly sliced green onions
1/3 cup chopped fresh cilantro

4 tablespoons extra-virgin olive oil
3 tablespoons fresh lime juice
2 tablespoons orange juice
2 1/2 teaspoons grated lime peel
1/4 teaspoon ground cumin
1/4 teaspoon kosher salt

Directions

Combine first six ingredients in a bowl. In a separate bowl whisk remaining ingredients and add dressing to bean salad. Taste for seasoning and add more if necessary. Cover and let stand at room temperature for one hour before serving.

Carne Asada With Cilantro Chutney

carne asada

Classic Mexican Dish with a Twist

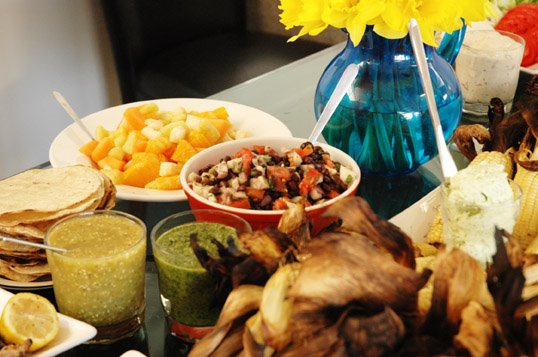
Carne asada is so simple and easy to make, yet so incredibly delicious. All it is really, is marinated steak---but with the Mexican ingredients and the smoke of the grill, this dish transforms into something magical! I paired this steak with a lovely Cilantro Chutney, just to update it a bit, and boy am I glad I did!
carne asada
We had this dish in Palm Springs for my birthday weekend, and I'm pretty sure the warm sun made this taste all the better!

Ingredients

Recipe serves 5
4 pounds Flat Iron Steak, sliced thin (It's important to NOT slice the steak into strips, but rather slice them so they are wide and flat, but about 1/4 inch thick)
1/2 large onion sliced into thin rings
2 tablespoons minced garlic
1 cup fresh lime juice
1/3 cup olive oil
2 tablespoons kosher salt

Directions

Place sliced steak in a large bowl or deep platter. Place all remaining ingredients in bowl with meat and mix so that meat is thoroughly mixed with marinade. Cover with plastic wrap and place in refrigerator and marinade for a minimum of 2 hours, but 4 hours is best.

Once marinated, spark up the grill, and grill 4 to 5 minutes on each side or until desired doneness. Make sure to grill onions along side the steaks...they'll add flavor! At this point I always squeeze some more lime juice and sprinkle a little extra salt on the meat.

Cilantro Chutney


cilantro chutney

Ingredients

2 cups firmly packed fresh cilantro sprigs
6 scallions, coarsely chopped
2 teaspoons finely chopped small hot green peppers, serrano or thai
2 teaspoons sugar
1 1/2 teaspoons ground cumin
1 1/2 teaspoons salt
1/4 cup fresh lime juice
1/4 cup olive oil

Directions

Puree all ingredients in a food processor until smooth. Slather on carne asada and enjoy!

Muddled Margaritas with Chili-Salt Rim


Delicious Twist On A Classic

Margaritas are one of my favorite drinks! For my birthday weekend in Palm Springs, Foodbuzz selected my meal as one of 24 meals for their 24,24,24 sponsored event and Margaritas were the drink of choice! Read the original post HERE.


These margaritas are special because they are made one at a time, with fresh ingredients, and feature a fiery chili-salt rim! If you are looking to make a large batch of margaritas, check out this great MARGARITA RECIPE...it's perfect for parties!

Ingredients

Recipe below makes one Margarita

1/3 cup Patron Tequila (don't even bother using the cheap stuff!)
1/4 cup triple sec
1/4 cup fresh lime juice
2 tbls simple syrup
1 slice orange
1 slice lime
1/2 cup chili-salt (this can be found in latin/mexican markets. You can also make your own by combining cayenne pepper and kosher salt.)

Directions

Take a slice of lime and rub it along the rim of an old fashioned cocktail glass. Place the chili-salt on a saucer plate and spread out. Take the cocktail glass and flip it over so that the rim is facing down and lightly tap the rim of the glass on to the chili-salt, making sure the rim gets completely covered.

Next, place an orange and lime slice in the bottom of the glass, fill with ice, and with a spoon or muddler, mash the slices to release their juices. Add remaining ingredients and top off with water. Enjoy! The ingredients can be adjusted according to your taste...add more simple syrup if you like them sweeter, more lime juice if you like them tart, etc. etc.

Want to receive our recipes free via email? Just follow this link!